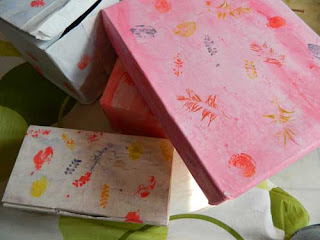
i am a huge fan of recycling, ‘upcycling’, reusing, anything that has to do with using the so-called waste stuff. so this festive
season i decided to do some useful recycling. there were lots of gifts to be
given around and of course they had to be wrapped up nicely. the easier way
would have been to buy some inexpensive wrapping paper and cover up the gift, right. but i decided to get a bit creative and use my old sheets which i no longer needed. one side of the paper was drawn upon but the other side (which I used) was
as good as new. if you would also like to put in that extra little effort, here’s
what you’ll need:
·
sheet of standard chart paper (equal to the size of
one sheet of wallpaper)
·
water colours
·
glue paste made by mixing two parts water and one part
white PVA glue
·
brushes
·
gift boxes
·
different items like leaves, petals, onions cut in
half etc to make stamps (use your imagination!)
·
ribbon (optional)
·
scissors

and here’s how to do it:
· take a sheet of chart paper, and start off by painting one side with some highly diluted water colours. the paper should be thick enough so as not to get damaged when soggy. by diluting water colours, you are able to use very little colour to paint the whole sheet and it also makes the paper easy to handle (you’ll see how).


· now take you gift box and coat the surface that is to be covered with the glue paste.
 ·
paste the paper carefully over all areas of the box,
folding or cutting it wherever necessary. NOTE: you have to move really fast, before the painted sheet dries up. since the sheet has been made soft due to all that water, you’ll have no trouble in folding it over the box when it is wet. if the paper dries before it is completely pasted, it would have become hard and difficult to fold according to will. But again, you have to be very gentle with the paper as it can be torn easily. let it dry for some time, preferable
in sunlight to speed up the process. once dry, press the sides of the box
lightly to straighten up any bending due to all that moisture.
·
next, take up your different “stamps” and cover the
box in bright color patterns. my favourite was the fern leaf stamp, which left
a very pretty imprint.


· and that’s it! your box is done. if you want, you can tie a ribbon as well to make it look prettier.


